
Related Posts


Podcasts


Running ads is one thing, but tracking the results and proving ROI? That’s the part most marketers struggle with. You might already be juggling Google Ads, Facebook Ads, or LinkedIn campaigns in their native platforms. But here’s the thing: none of those platforms talk to your CRM. So, when a lead comes in, you’re left guessing where they came from, which ad worked, and what drove revenue. That’s where HubSpot comes in.
Setting up paid ads in HubSpot lets you bring everything under one roof. You can connect your ad accounts, sync audiences with your CRM, track original source data, and finally get full-funnel visibility—right down to which ad turned into a deal.
In this guide, you’ll learn exactly how to set up paid ads inside HubSpot, step-by-step. No fluff. Just clear instructions, the right settings, and how to make sure your tracking works from day one.
Step 1: Connect Your Ad Accounts to HubSpot
Before you can run or track any ads inside HubSpot, you need to connect your ad accounts.
Here’s how to do it:
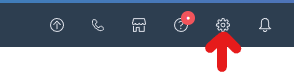
- In HubSpot, go to Settings in the top navigation menu.
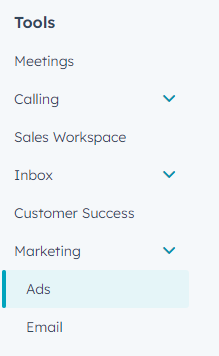
- In the left sidebar menu, navigate to Marketing > Ads.
- Click Get started with Ads.

- Select Facebook, LinkedIn, or Google and log in with your account. For Facebook you will log in with your Facebook Profile, for LinkedIn with your LinkedIn Profile, and for Google Ads with your google account.

- After connecting your ad accounts, click the ‘Lead Syncing’ tab.

- Click “connect” and check the pages you’d like to sync leads with, and then click “Save.”


- Click the Pixels from your connected ad accounts dropdown menu, any pixels for the connected ad accounts will automatically appear. Then, select the checkbox next to the pixels that you’d like to sync.
- In the bottom right, click Go to ads.

You can now click “Go to ads” to start building your campaign, or simply click “skip this step.”
Once connected:
- HubSpot will begin pulling in data from active campaigns.
- You’ll be able to create new ads directly from HubSpot.
- Contacts who click on your ads will be automatically tracked in your CRM, and attributed via original source reporting.
Important: Make sure you’re connecting the actual ad account (not just a business manager or page), and that you have the right permissions to do so—ideally admin or equivalent.
Step 2: Create a Campaign in HubSpot
Once your ad account is connected, the next step is to create a campaign within HubSpot. This helps you group assets like ads, landing pages, emails, and CTAs under one strategy—so you can track performance holistically.
To create a campaign:
- Go to Marketing > Campaigns.

- Click Create campaign (top right).

- Click “Start from scratch” and click “next.”

- Set your campaign details
- Click Create.
Now, when you build your ads (in the next step), you’ll be able to assign them to this campaign—making it easier to report on outcomes and compare performance across different channels.
Tip: Add any landing pages, forms, emails, or CTAs you’ll use to this campaign as well. HubSpot will then show you total conversions from all assets linked to the campaign, not just the ads.
Step 3: Build and Launch Your Ad
Now that your campaign is set up, it’s time to actually create your ad inside HubSpot. You can do this directly from the Ads dashboard.
Here’s how to build your ad:
- Go to Marketing > Ads.

- Click “Create” and then “ad campaign”.

- Select your ad type and your ad account and page.

From here, it’s pretty straightforward. Do note however, that depending on the ad type you choose, the steps will differ.
Here are three separate official HubSpot Guides for Paid Ads depending on the ad type you choose:
HubSpot will automatically start tracking performance as soon as your ad goes live.
Tip: If you’re sending traffic to a HubSpot landing page, tracking is seamless. If you’re using an external page, make sure HubSpot tracking code is installed there.
Step 4: Set Up Tracking & Original Source Reporting
This is the part most people miss—and it’s what makes using HubSpot for paid ads so powerful. When set up correctly, HubSpot tracks the original source of every contact that clicks on your ad, and ties that contact to deals, revenue, and lifecycle stages in your CRM.
To ensure proper tracking:
- Make sure the HubSpot tracking code is installed on any external landing pages (if you’re not using HubSpot pages). Here’s a guide on exactly how to install HubSpot tracking code on your website.
- Use HubSpot forms on landing pages whenever possible—they auto-track contacts and associate them with the original ad. If you’re using native lead forms (like Facebook Lead Ads), HubSpot will still capture leads automatically if the ad account is properly connected.
- Go to Reports > Marketing Analytics.

- In the left menu, go “Marketing” > “Web Traffic Analysis” > “Sources”. This will provide you with a report showing original source in relation to website traffic.

For contact-level tracking, go to Contacts, filter by “Original source: Paid Search” or “Paid Social”, and view the full journey, from ad click to deal closed.
Tip: You can also use the Campaigns tool to view all leads, sessions, and influenced deals linked to your ads—especially helpful for reporting on ROI.
Limitations of Paid Ads Through HubSpot
While running ads through HubSpot offers massive benefits in tracking and CRM integration, it’s not a full replacement for native ad platforms—especially when it comes to advanced campaign features.
Here are some key limitations to be aware of:
- Limited control over complex campaigns
HubSpot doesn’t support all ad formats, objectives, or targeting options available in Google Ads, Meta, or LinkedIn. For example, advanced YouTube campaign types or certain LinkedIn lead gen formats aren’t supported directly in HubSpot. - No native audience creation
You can sync lists from your CRM, but you can’t build interest-based or behavioural audiences natively in HubSpot—you’ll still need to use the ad platform for those. - A/B testing isn’t built into HubSpot
You can test ads manually by duplicating and tweaking versions, but there’s no native A/B split testing functionality. You’ll rely on your connected ad platform for structured experiments. - Form limitations on external sites
If you use non-HubSpot landing pages and don’t implement the tracking code correctly, you might lose visibility on form submissions and conversions. - Reporting is limited to HubSpot-tracked data
While HubSpot shows great CRM-level insight, it won’t pull in every metric you might use in Ads Manager—like quality score, impression share, or in-depth demographic performance.
Bottom line: Use HubSpot to manage campaigns where CRM data and attribution are most valuable—especially lead generation. But for advanced ad builds or detailed optimisations, keep the native platform close by.
So, What’s Next?
Running paid ads is easy. Running ads that actually deliver ROI? That takes strategy and the right tools.
HubSpot brings your ad campaigns and your CRM together, giving you full visibility from the first click to closed deals. When set up correctly, you’ll not only know which ads generate leads, but also which ones create customers and revenue.
Next, you’ll want to learn how to make sure your paid ads convert into leads and sales.