









How Do I Set Up HubSpot CRM Integrations With Zapier, Xero, or Survicate?

Key Takeaways
Setting up a HubSpot CRM integrations with any of these three tools takes under 15 minutes on the HubSpot side. The details below are what actually determine whether it works properly once it’s live.
- Zapier connects HubSpot to 1,400+ apps for free, but HubSpot is a premium app on Zapier’s side. A paid Zapier plan is needed for real, multi-step automations
- Xero’s contact sync is free on any HubSpot plan. Custom field mapping needs at least Data Hub Starter, from roughly AUD $13/seat/month
- Full invoice and payment sync with Xero only works for accounts based in Australia, New Zealand and the United Kingdom
- Xero requires phone numbers in international format. An Australian number needs the +61 prefix, or it won’t map
- Xero also requires the matching contact and product to exist first, before it will accept an invoice sync
- Survicate’s HubSpot integration is free on every HubSpot plan, but it runs two separate paths: syncing survey answers to contact properties, and pulling HubSpot tickets into Survicate’s Insights Hub. Setting up the wrong one for your goal wastes time
- Bi-directional sync, across any of these three tools, needs a clear source of truth assigned per field before it’s switched on, to avoid one system silently overwriting good data in the other
- Small formatting inconsistencies, extra spaces, capitalised emails, missing phone prefixes, create duplicate records even though HubSpot’s built-in deduplication checks contact emails and company domains automatically
Setting up a HubSpot CRM integration always sounds simple. Then you’re staring at a field-mapping screen, wondering what breaks if you click the wrong thing.
The reality hits: Zapier needs configuring, Xero needs to talk to your deals, and Survicate’s feedback data still sits in its own dashboard.
Three tools, three logins, and one nagging question: will this create duplicate contacts, or undo the clean database you just built?
At RedPandas, we’ve watched Australian businesses hit the same snags: phone numbers that won’t sync to Xero without a +61 prefix, invoice features that only work in Australia, New Zealand and the UK, and paid tiers bought for features they never needed.
As a HubSpot Diamond Solutions Partner, we’ve run these exact integrations for ANZ businesses for years.
This guide walks you through Zapier, Xero and Survicate setup step by step, tier by tier, so you know exactly what to click, what to skip, and where the region-specific traps sit.
Quick Answer
A HubSpot CRM integration with Zapier, Xero, or Survicate typically takes under 15 minutes to connect.
Zapier and Survicate install directly through HubSpot’s App Marketplace and work on every plan, including Free.
Xero’s native app installs just as fast, though full invoice and payment sync only works for Australian, New Zealand and UK accounts.
Custom field mapping in Xero needs HubSpot’s Data Hub Starter tier, from around AUD $13 per seat per month, and none of the three integrations needs a developer or custom code.
What Is a HubSpot CRM Integration?
Why a HubSpot CRM Integration Matters for Growing ANZ Teams
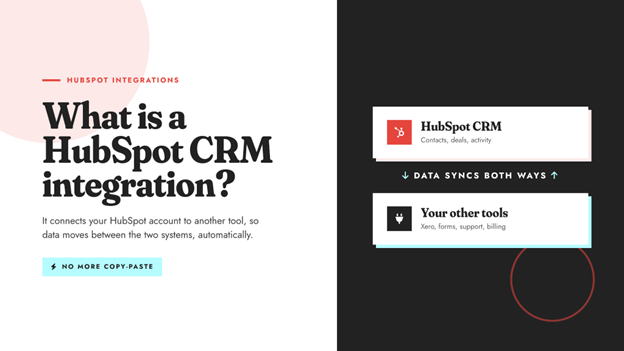
A HubSpot CRM integration connects your HubSpot account to another tool, so data moves between the two systems automatically.
Instead of manually copying a contact into Xero or retyping a survey response into a contact record, the integration does that transfer for you.
Native vs Custom HubSpot CRM Integrations
Most HubSpot CRM integrations fall into one of two categories:
- Native integrations are pre-built connectors installed straight from the HubSpot App Marketplace. They’re designed for minimal setup and rarely need any code. Connecting a CRM to common tools like Gmail, Outlook or Slack through native integrations typically takes just minutes to configure
- Custom integrations use HubSpot’s API to build a connection from scratch. These suit businesses with workflows a native app can’t handle, though they take considerably longer. Simple API-based integrations often take two to three weeks to complete, while more complex ones can run six to eight weeks or longer
A third category, middleware or iPaaS platforms like Zapier, sits between the two. These stay largely no-code, but add a connecting layer for tools without a direct native app.
Setting up automated workflows on platforms like Zapier generally takes one to three days for planning, configuration and testing.
Zapier, Xero and Survicate, the three integrations covered in this guide, are all native or near-native connections.
None of them needs a developer, which is exactly why each takes minutes, not weeks, to get running.


What Are the 7 Best HubSpot Integrations for Australian Businesses?
How to Set Up a HubSpot CRM Integration With Zapier
Connecting Zapier is the most straightforward of the three integrations. Here’s exactly how it works.
Step 1: Install Zapier From the HubSpot Marketplace
You’ll need Super Admin permissions in your HubSpot account to connect Zapier. HubSpot enforces this requirement on its side.
Follow these steps:
- In your HubSpot account, click the Marketplace icon in the top navigation bar

- Select HubSpot Marketplace, then search for Zapier

- Click Install
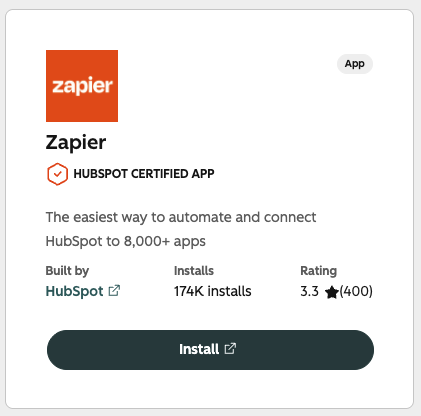
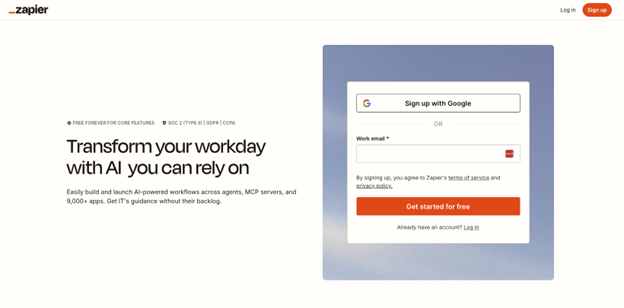
- Log in to your existing Zapier account, or sign up for a new one
- Create your first HubSpot Zap to finish the setup
Installing Zapier this way costs nothing on HubSpot’s side. It works on every HubSpot plan, including Free.
Step 2: Choose the Right Zapier Plan for Your HubSpot CRM Integration
Here’s a detail most setup guides skip.
HubSpot is classified as a premium app inside Zapier. Zapier’s free plan caps you at 100 tasks a month, two-step Zaps only, and no premium app access.
If you want to build a real workflow using HubSpot, budget for Zapier’s entry-level paid plan at the bare minimum.
Step 3: Build Your First Zap
Once both accounts are connected, building a Zap follows the same pattern every time.
- In Zapier, choose your trigger app. Select HubSpot if a HubSpot event, like a new contact, should start the workflow
- Connect your HubSpot account if prompted, then configure the trigger details
- Add your action step. Choose the app HubSpot should update, or select HubSpot if another app should trigger a HubSpot action
- Test the step to confirm it runs correctly
- Click Publish to take the Zap live
A Few Things to Check Before You Go Live
A handful of details catch teams out after their HubSpot CRM integration with Zapier is already running:
- Datetime values sent through Zapier round down to UTC midnight once they land in HubSpot. This can create date mismatches against the original source app
- Some HubSpot triggers and actions, including the new blog article and new calendar task triggers, only work on paid HubSpot plans. Free and Starter accounts won’t see them
- The Add Contact to List action also needs the contact to already exist in HubSpot. Zapier won’t create it mid-workflow
How to Set Up a HubSpot CRM Integration With Xero
Xero is the integration where sequencing matters most. Get the order wrong and invoices simply won’t sync.
Before You Start: What a HubSpot CRM Integration With Xero Requires
You’ll need Super Admin or App Marketplace permissions in HubSpot to connect Xero. On the Xero side, a Starter, Standard or Premium plan covers contact sync.
Custom field mapping, beyond the default fields HubSpot maps automatically, needs at least Data Hub Starter, from roughly AUD $13/seat/month.
If your Xero account has two-factor authentication enabled, complete that setup before you start. A known issue flags 2FA as incomplete during connection even when it’s active, which can waste your time on troubleshooting something that isn’t actually broken.
Step 1: Install and Connect Xero
- In your HubSpot account, click the Marketplace icon in the top navigation bar, then select HubSpot Marketplace

- Search for Xero (by HubSpot) and click Install

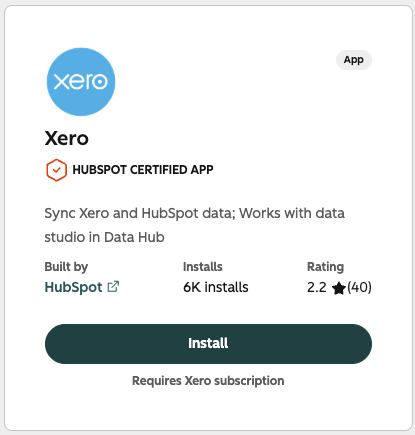
- Enter your Xero login details when prompted, then authorise the connection
- Follow the guided setup to begin configuring your sync
Step 2: Set Up Contact and Product Sync First
Xero requires a contact and a product to already exist before it will accept an invoice. Set these syncs up before touching invoices.
For each object, you can choose:
- Sync direction: one-way or bi-directional
- Data conflict resolution: which app wins when records disagree
- Field mappings: default fields sync automatically; custom mappings need Data Hub Starter or above
One detail worth flagging here: Xero requires phone numbers in international format. An Australian mobile stored as 04XX XXX XXX in HubSpot won’t map cleanly. It needs the +61 prefix first.
Step 3: Turn On Invoice and Payment Sync
Once contacts and products are syncing cleanly, invoice sync is safe to switch on.
Two-way invoice sync suits small businesses running billing directly from HubSpot, whether that’s:
- Manual invoices
- HubSpot’s subscription tools
- Converting won deals into payable invoices
Payment sync then runs automatically. When a customer pays an invoice in Xero, the payment status updates on the HubSpot contact record without anyone in sales needing to check with accounting.
Here’s the detail that trips up a lot of Australian businesses trying this HubSpot CRM integration: full invoice and payment sync only works for accounts based in Australia, New Zealand and the United Kingdom.
Businesses outside those regions get contact and product sync, but not the full billing loop.
A genuinely useful side effect of connecting Xero is that your Xero tax rates, including GST, import automatically into HubSpot’s tax library. Any invoice created in HubSpot and pushed to Xero already carries the correct tax handling.
Xero Integration Limitations to Know Before You Commit
A few constraints are worth knowing upfront rather than discovering mid-setup:
- Currencies: the native connector supports six currencies natively, including AUD and NZD. Other currencies aren’t covered
- Multi-tenant Xero accounts: these aren’t supported by the native connector
- Editing invoices: invoices created from HubSpot need to be edited in HubSpot, not in Xero, to keep both records aligned

What Services Does a HubSpot Solutions Partner Typically Offer to Clients?
How to Set Up a HubSpot CRM Integration With Survicate
Survicate is the only one of these three where the setup path depends on what you’re actually trying to achieve. Sending surveys through HubSpot and pulling HubSpot tickets into Survicate’s Insights Hub are two different connections.
Step 1: Connect HubSpot as a Data Source in Survicate
If your goal is pulling HubSpot ticket data into Survicate for analysis, start here.
- In your Survicate panel, go to Integrations

- Choose HubSpot from the list, then click Connect
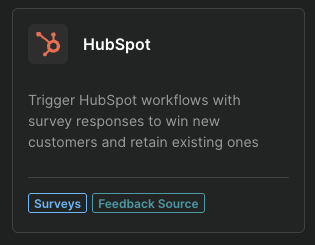

- A pop-up window will prompt you to log in to your HubSpot account. Allow pop-ups in your browser if it doesn’t appear
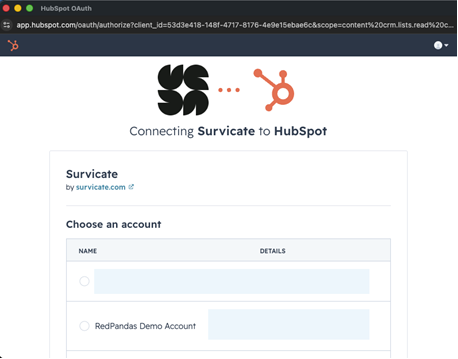
- Turn on automatic synchronisation of HubSpot tickets, choosing whether to import all tickets or only selected categories
- Decide whether to sync tickets from the point of connection onward, or include historical tickets too
If you’re feeding this data into Survicate’s Research Hub specifically, stick to Closed tickets import only. Open or in-progress tickets won’t appear until they’re resolved.
Step 2: Enable Survicate’s HubSpot Integration for Sending Surveys
If your goal is running NPS, CSAT or CES surveys and syncing the answers back to HubSpot, this is the path to use instead.
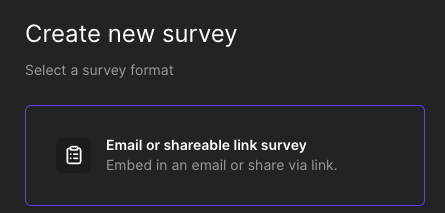
- Create a new survey in Survicate, choosing an Email or Shareable link survey type

- In the Configure tab, select HubSpot as the tool to identify respondents

- Go to Integrations > HubSpot, or the survey’s Connect tab, and enable the integration
One limitation worth knowing upfront: automatic respondent identification only works for HubSpot Marketing Hub users, on surveys sent through HubSpot Marketing Emails.
For one-to-one emails sent from a contact record, add a contact form question to your survey so respondents can be identified manually.
Step 3: Turn On App Cards Inside HubSpot
App Cards let your team see Survicate data directly on HubSpot records, without leaving HubSpot.
- In HubSpot, go to Settings > Integrations > Connected Apps > Survicate > App Cards
- Choose between Send feedback to Survicate and Survey responses
- Click Manage Locations to decide where the card appears: Contacts, Companies, Deals or Tickets
Mapping Survey Responses to HubSpot Contact Properties
Once responses are flowing, map them to actual contact fields so the data is usable, not just visible.
- In the Settings tab of the HubSpot integration, find the Update fields section
- Select the survey question whose answers should update a HubSpot field
- Add the target HubSpot property name under User field
By default, Survicate sends the response as the raw attribute value. You can edit this mapping if you need a shorter label or a different data structure to match your existing HubSpot CRM integration setup.
NPS responses map slightly differently, since Survicate sends a response-group value rather than the raw score.
For Australian businesses running HubSpot alongside a feedback programme, this mapping step is what actually makes a HubSpot CRM integration with Survicate worth the setup time.
Without it, feedback sits in Survicate’s dashboard exactly as disconnected as it was before.
A Note on Cost
Survicate’s HubSpot integration is listed as available from its Free plan upward, but full Insights Hub analysis and higher response volumes need a paid Survicate tier.
Published pricing for these tiers is inconsistent across sources at the time of writing, so it’s worth confirming current plans directly on Survicate’s pricing page before committing.
If you want to learn more about what other options you have, check out this guide on what HubSpot integrates with and what it can’t connect to.
Frequently Asked Questions: HubSpot CRM Integration Setups
Is the HubSpot Zapier integration free?
Yes, connecting Zapier to HubSpot costs nothing and works on every HubSpot plan, including Free. However, HubSpot is classed as a premium app inside Zapier, so building real multi-step workflows using HubSpot data needs a paid Zapier plan, starting from around AUD $28 to AUD $43 per month.
Do I need a developer to set up a HubSpot CRM integration?
No. Zapier, Xero and Survicate all install through HubSpot’s App Marketplace using point-and-click setup, with no coding required. Xero’s custom field mapping is the only part that benefits from technical input, mainly for businesses with complex product catalogues or non-standard invoicing processes needing precise data alignment.
Can I connect Xero to HubSpot for free?
Basic contact sync between Xero and HubSpot is free, available on any HubSpot plan alongside a Xero Starter, Standard or Premium subscription. Custom field mapping beyond the default fields requires HubSpot’s Data Hub Starter tier, priced from roughly $9 USD per seat monthly, billed annually.
Why won’t my Xero invoices sync to HubSpot?
Xero requires a matching contact and product to already exist before it accepts an invoice sync. Setting up invoice sync before contact and product sync are running causes errors. Full invoice and payment sync also only works for accounts based in Australia, New Zealand or the United Kingdom.
Does Survicate work with the free HubSpot CRM?
Yes, Survicate’s HubSpot integration works on every HubSpot plan, including the free tier. It syncs survey responses like NPS and CSAT scores directly to HubSpot contact properties. Higher response volumes and full Insights Hub analysis need a paid Survicate subscription, separate from HubSpot’s own pricing.
Will a HubSpot CRM integration create duplicate contacts?
It can, if data isn’t clean beforehand. HubSpot’s deduplication checks email addresses for contacts and domain names for companies, but small differences like extra spaces or missing phone number prefixes still slip through. Cleaning contact data before connecting a new integration significantly reduces duplicate records.
What HubSpot plan do I need for Zapier automations?
Zapier connects to every HubSpot plan, including Free. Some specific triggers, including new blog article and calendar task triggers, only work on paid HubSpot plans. Most core objects, contacts, companies and deals, sync on any HubSpot plan, provided your Zapier subscription supports premium app connections.
Can I sync HubSpot with Xero outside Australia?
Partially. Contact and product sync between HubSpot and Xero works globally, on any supported Xero plan. Full invoice and payment sync is limited to businesses based in Australia, New Zealand and the United Kingdom. Businesses elsewhere can still automate contact data, just not the billing workflow.
What’s Next for Your HubSpot CRM Integration?
You’ve now got the exact steps for connecting HubSpot to Zapier, Xero and Survicate. The real question left is where to actually start.
Don’t try to launch all three at once. Pick whichever integration is solving your biggest problem right now, and start there.
If invoices and deals sit in two different systems, start with Xero. If your team copies data between five different apps by hand, start with Zapier. If customer feedback sits in a dashboard nobody checks, start with Survicate.
Get that one integration running cleanly first. Test it against a small batch of records, exactly as covered earlier in this guide. Then move to the next.
Build a HubSpot CRM integration one tool at a time, testing as you go, and it holds up cleanly. Switch everything on at once and skip the testing, and duplicate records creep in fast.
If you’d rather have someone else configure it properly the first time, RedPandas does exactly that. We work with HubSpot customers across Australia every week.
Get in touch with RedPandas, and we’ll get your HubSpot CRM integration running properly, without the trial and error. Book your free consultation with our HubSpot experts through the link below:

Book Your FREE HubSpot Integration Consultation Here
About the Author
This article was written by the team at RedPandas Digital, a HubSpot Diamond Solutions Partner based in Sydney, Australia. RedPandas is one of a small number of agencies accredited under HubSpot’s Partnered Scale Onboarding programme, and has delivered results including a 49.8% revenue increase and 378% lead growth within five months for an Australian client.
About the Author




Get the best content marketing insights right in your inbox!
Subscribe to our Newsletter and get marketing insights delivered to your inbox every week.